|
|
 |
|
Phoenix College: Class ID#19151 Fall '13
|
|
|
|
|
|
|
|
|
E-mail: chm107pc@chemistryland.com |
|
|
|
|
Phoenix College: Class ID#19151 Fall '13
|
|
|
|
|
|
|
|
|
E-mail: chm107pc@chemistryland.com |
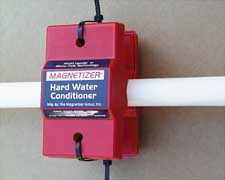
| Most of the time we have to take someone else's word about the effectiveness of a product or the purity of something because we cannot verify it ourselves. This course tries to remedy that disadvantage. By doing our own testing, we can discover our own facts about things. For example, some companies sell magnets that are suppose to do the same as water softeners. With your test kit you can find out for yourself the validity of such claims. |
 |
|
This course puts much emphasis on environmental issues. The lab lets you explore the issues by doing your own testing. Testing will start in the home but can also expand to any area you may be able to visit. This lab also reinforces good scientific techniques and makes you aware of the factors that cause experimental data to be questioned or trusted. |
 |
| STEP #1: Throughout the Maricopa College district most colleges require students taking a chemistry lab course to sign an Assumption of Risk Statement. This form basically shows that you recognize some inherent dangers participating in a chemistry lab and that you will not hold the college responsible for any injuries you might experience doing the labs. You can view the form online at this Web address. When you pick up your kit, you can sign the form then. |
 |
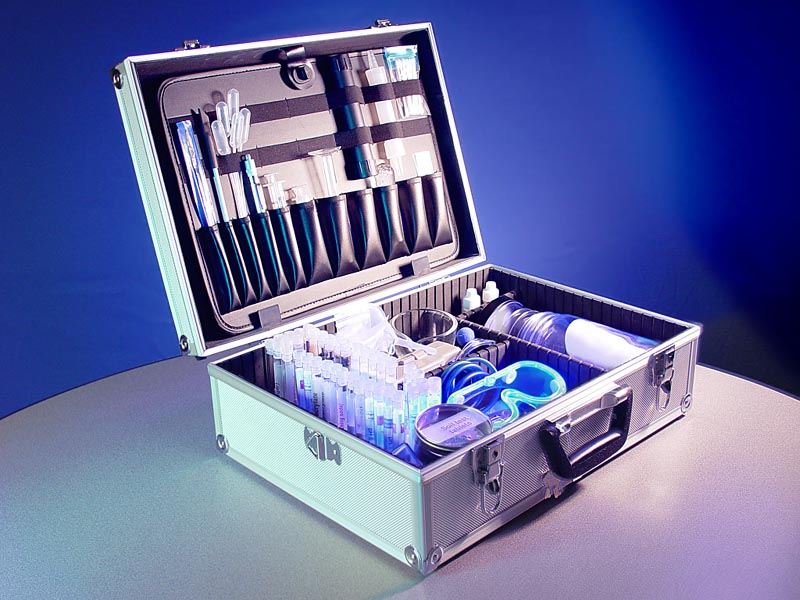
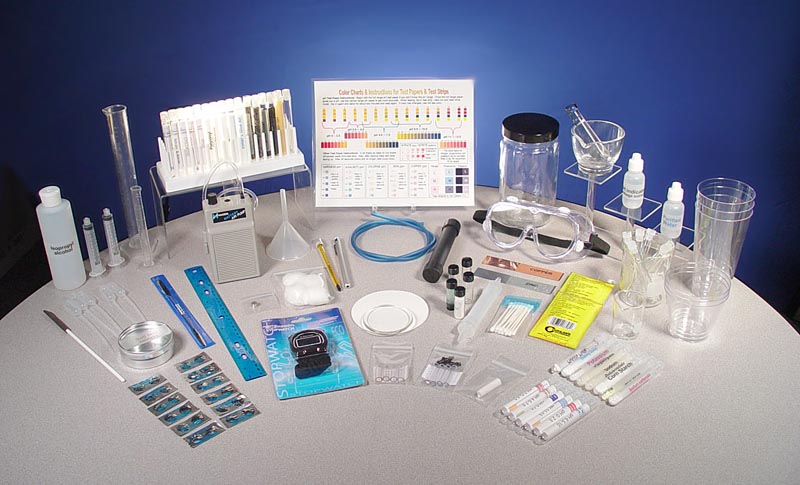
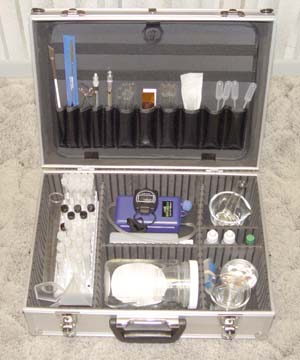
| Below are images of the portable chemistry kit showing the case with the items and the items spread out so you can see them better. The kit has change a little since these photos were taken. A few items were updated and some were replaced by other items. |
 |
 |
| I would like to point out
that I think this lab is quite safe. The most dangerous part of
it are the few things made of glass, which could break if dropped.
But this isn't any more dangerous than handling a drinking glass.
Nearly all of the chemicals in the kit are safe. The ones that are not
healthy are in very small quantities. The test strips, for example, have
a small coating of chemicals glued to their tips. I'm sure the chemicals
aren't healthy, but you would have to eat several of them including the
plastic to get much of dose. Plus, I'm sure you're not going to
take out a test strip and start chewing on it. And if you have pets
or small children around, I'm sure you won't let them chew on these items
either. The kit can be locked if you want to be sure no one else
gets into your kit. Below is a list of the other chemicals in the kit.
A few small tablets sealed in foil that are used in soil testing. These aren't healthy either. But again, you would have to eat these to be a problem. The testing materials in this kit are much safer than the ones you can buy at the pet store or plant nursery. Included is an ion exchange resin that are used in water softeners. It absorbs dissolved calcium and magnesium and releases sodium. There is also a similar ion exchange resin, but this one is used to make deionized (distilled) water. Both of the ion exchange resins are considered safe, but I would not eat them. The kit also contains activated charcoal, which you could eat if you wanted to. In fact, activated charcoal in water is given to children who have swallowed a poison and it is available at health food stores. The kit contains sodium polyacrylate, which is used as a plant gel and water absorbent. Sodium polyacrylate is also used to provide water for animals while being transported. The animals eat it to get water. So it is safe. Potassium iodide (KI). These are sold as tablets to be taken in case of a nuclear explosion which creates radioactive iodine. The theory is if you supply your body with plenty of iodine (by taking KI tablets), then the body won't absorb the radioactive iodine that will be in the air after a nuclear blast. So these are pretty safe. In one lab you will use potassium iodide for making your own ozone testing paper. There will also be some borax in your kit. Borax is used as a laundry cleaner booster. It softens the water so the soap is more efficient. Borax is not toxic, but like any powder, it's not fun to get in the eyes. There are only two chemicals you need to buy if you don't have already. One is distilled water and the other is rubbing alcohol (isopropyl alcohol). |
| STEP #2:
Purchase your chemistry kit. As students enrolled in the class you will be able to buy the kit at $250 + tax, which is a heavily discounted price. You will be sent an email that will take you directly to the shopping page for CHM107 students. You can pay with credit card or with a Paypal account. The chemistry kit is not available at the PC bookstore. After purchasing the kit online, you will be able to pick it up at PC. The instructor will set us some evening meeting times for pickup. If you can't come to the PC campus, the instructor might be able to meet you closer to where you live or work. Also, the chemistry kit can be mailed to you for an additional shipping fee (about $20-$30). |
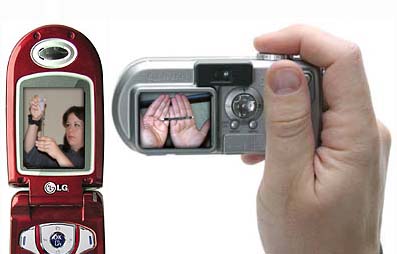
| STEP #3: You will also need access
to a digital still camera or cameraphone so you can document your labs.
One disadvantage in teaching a distance learning version of a chemistry
lab is the instructor can't see how you perform the lab. By taking
pictures you can show yourself doing the lab. By taking closeups of the
experiment, the instructor can see if your technique is good and your
results are valid. Even if this wasn't a distance learning
lab, taking pictures of the experiment is a good way to document the procedure
and results.
Any digital still camera is OK to use. Try to set camera to use 1 or 2 megabytes. That's 1024 pixels wide up to 1600 wide. If your cellphone can take images at 640x480 or better, then that's OK, too. If you have a helper, your helper can take the pictures as you do the experiment. |
 |
| STEP #4: The next step is to get familiar with the contents of the chemistry kit. Here is a list of items in the kit. | |
|
Aluminum case that stores all kit items |
 |
|
Mortar and pestle (for grinding samples) Microspatula (for scooping up small amounts of powdered
material) |
|
| The labs listed below are general descriptions. Detailed lab instructions are already on the Web or will be placed there just prior to the lab. |
| Testing the Air We Breathe. This series of experiments relate to what's in the air we breathe. | 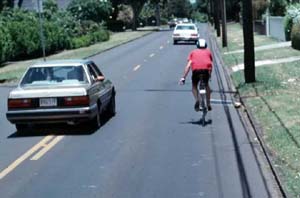 |
||
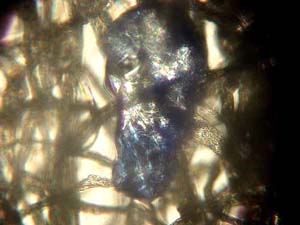
| Experiment #1, Examining
Particulates Inside and Outside: Included in your kit is a miniature microscope. You will use it to look at particles (particulates) that are often in the air.
|
 |
||
| Experiment #2: Car Exhaust:You will show water vapor present by condensing the vapor on a cool surface. You may also be able to see evidence of the carbon dioxide emission because carbon dioxide will turn to carbonic acid when it contacts water. |  |
||
|
 |
| CARBON DIOXIDE. These experiments relate to the rising levels of carbon dioxide in the atmosphere. | |
| Carbon dioxide and water vapor are two common greenhouse gases. Carbon dioxide is looked upon as the biggest contributor to global warming. | 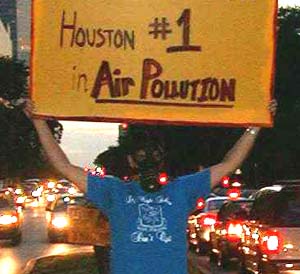 |
| Experiment #4, Biodiesel purification: In this experiment you go through the stage of purifying the biodiesel created from vegetable oil so it can be placed into a diesel engine. This impure biodiesel contains glycerin and residues of methanol and sodium hydroxide (lye). | 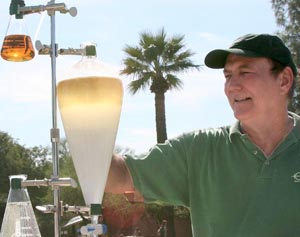 |
| Experiment #5, CO2 detection: The higher levels of carbon dioxide are harming the reefs because carbon dioxide creates carbon dioxide when in contact with water. This is making the oceans more acidic, which dissolves the coral. This experiment shows how we can detect this carbon dioxide (similar to experiment #2). |
 |
| ENERGY (3 experiments) | |
| These experiments help you see how energy changes forms and the consequences of using energy. Waste heat, testing energy efficiency of light sources, and detecting high energy light (UV light) are covered in these experiments. |
 |
| EXPERIMENT #6, ENERGY CONVERSION- ELECTRICAL: You will need access to a blender for this experiment. You will find that electrical energy changes to magnetic field energy (in the motor), which changed to kinetic energy (rotating blades and rotating water), to finally heat energy (faster moving water molecules[hotter water]). The amount of energy absorbed by the water will be calculated. Since only water is used, this experiment will be safe for the blender. |
 |
| EXPERIMENT #7, ENERGY SAVING LIGHT SOURCES: Your kit has a spectroscope which uses a special film (called a diffraction grating) that acts as a prism. This helps you see the spectrum of light coming from different light sources. This labs lets you explore the differences in sources of light, which gives you an idea of its chemical makeup and whether a bulb is efficient or not. |  |
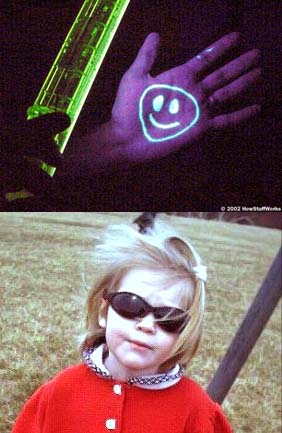
| EXPERIMENT
#8, UV LIGHT DETECTION: We've all experienced
sunburns which are due to the ultraviolet light from the sun. The
higher energy of ultraviolet light can damage skin. As we enter an era
where ultraviolet light levels are growing because of the decrease in
stratospheric ozone, it would be important to know how to detect UV light.
Some materials absorb UV light and convert it to visible light. These are the materials that glow under UV light (black light). Your kit has some UV detection beads that change color when UV light is present. Sunglasses are suppose to block 100% of the ultraviolet light that gets through the atmosphere. In this experiment we will test these claims. We will also look at sunblock lotions. Like all experiments, more details on how you will set up this experiment will come later. |
 |
|
TESTING WATER AND SOIL: (5 experiments) |
|
| EXPERIMENT #9, TAP WATER TESTING: Your tap water will be tested in 7 categories; pH (acid level), chlorine level, hardness (calcium and magnesium), nitrates, nitrites, copper, and iron. |  |
| You will also test a sample of your tap water, Saguaro Lake wate3r, and a beverage with a Total Dissolved Solids meter. |  |
| Experiment
#10, pH Indicator extracted from Red Cabbage: Above you used pH paper for testing acidity or alkalinity. You can make you own pH indicator that will do about the same thing. This experiment shows you how to extract a purple dye found in red cabbage that is often used to indicate pH. |
 |
| EXPERIMENT
#11, PURIFICATION METHODS: The next task is to test different methods
of water purification.
ACTIVATED CHARCOAL: Activated charcoal (good for removing medium to large molecules such as those that comprise solvents, odors, drugs, pesticides, and flavorings. ION EXCHANGE RESIN-SODIUM: The sodium type is used in water softeners. The exchange is to release two sodium ions for each calcium ion it hangs on to. ION EXCHANGE RESIN: Ion Exchange Resin for deionization (removes all positive and negative ions to make mineral-free water) DISTILLATION: Distillation is boiling water and then collecting water vapor, which leaves dissolved salts behind. MAGNETIC WATER SOFTENING: Magnet induced water softening (An advertised method for water softening being promoted by various companies) In your kit you have the materials to perform the above water purifications and to test their results. More details on how you will do these tests will be placed on the Web before you need to do the lab. You will also learn about water sterilization methods for destroying bacteria and viruses. |
 If these were a single chain, then the polymer would be the same as Styrofoam (polystyrene). However, this is a crosslinked version that begins the creation of the ion exchange resins.
|
| Experiment #12, Combination Filter: From the information learned in experiment 11, you will create a combination filter that will be good for removing a variety of contaminants. |
 |
| EXPERIMENT
#13, SOIL TESTING: This experiment will test for three common soil nutrients: nitrate, potash, and phosphorus. The results will tell you if your soil has enough of the nutrients. You will also test the pH of the soil, which is important for certain types of plants. |
 |
|
THE SCIENCE MAGICIAN |
|
 |
This is a fun series of experiments because you get to impress people with the "magic" of chemistry. |
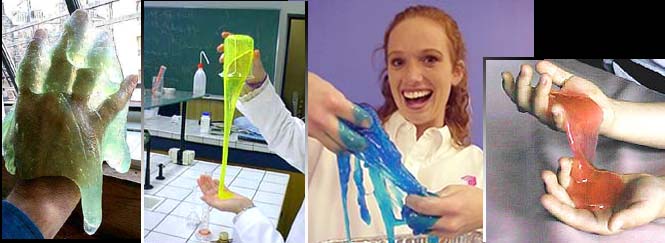
| Experiment #14, Slime: In your kit you have a tube of this polyvinyl alcohol. Polyvinyl alcohol is soluble in water. After making a solution of this polymer you can mix it with solution of borax. When the two solutions are mixed, the borax causes the chains of polyvinyl alcohol to cross-link to each other, which causes the polyvinyl alcohol to no longer stay dissolved in water. It then turns into a gel with the odd consistency of slime. |
 Polyvinyl alcohol chain |
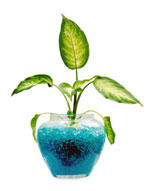
| Experiment #15, Super slurper: Sodium polyacrylate is a polymer that absorbs 300 times its own weight in water. It was first invented as an additive to soil to help the soil hold water. Your kit has this plus some plant food and food coloring. Pick a container of your choice and transfer a small house plant to it. This polymer is also used to make instant "snow," which you will also do to impress people. |
  |
| Experiment #16, Fireproofing: One way to recycle paper is to shred it and then add some fireproofing chemicals. The paper can then be used as insulation. This experiment shows you how to keep items from burning, which will surprise people |
 |
QUIZZES: Most of the labs will have a quiz to go with the lab report. I always offer students chances to redo questions on quizzes or redo a lab. My goal is that you learn the material. If you restudy and do it over again, I'm happy to regrade it. I usually push students to get 100% on their quizzes, and assignments even if it takes a few tries. |
|
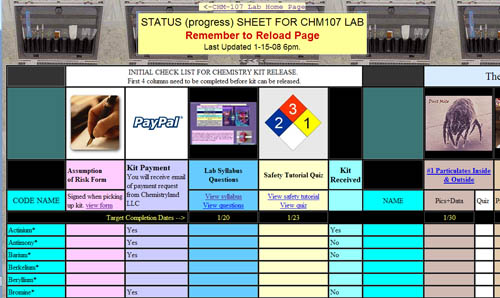
On the lab home page you will see a link to "CHECK PROGRESS". The progress page is a table (see below) where you can see what labs and pictures that I have received and if there are any quiz questions that need to be redone. If I say "Sent 10-2" that means you sent it on October 2nd, but I haven't graded it yet. If I write "Done," then it means you got 100%. If a question is missed, I will say "Redo" followed by the question number. Also, instead of your name listed on the progress sheet, I will give you a code name using the name of an element (same as for lecture). |
|
|
Even though I do not have strict due dates, I do have target dates (seen on progress page). I like the course to be flexible to accommodate unforeseen circumstances or irregular schedules. However, if you get too far behind, I will prod you to catch up. If you do not communicate with me and are far behind (4 labs behind), I may have to withdraw you from the course. |
SPECIAL LEARNING NEEDS: |
|
All Maricopa Community College students are expected
to be familiar with the Student Guide that explains the policies, procedures,
and resources for students. A link to the home page for the Student
Guides is below. |
 |
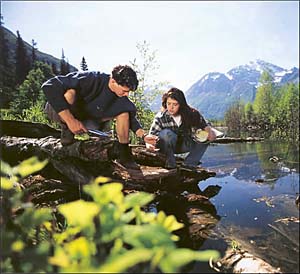
In summary, I think doing labs at home or in the field is the best way to get acquainted with chemistry. It's important to be aware of what's happening around you. You can’t always depend on the city or government to provide a safe environment. You need to be able to check some things for yourself. Welcome to Chemistry & Society laboratory class. Now, let's see what’s in this water… |
 |
Hits from different computers since Aug,
2007