|
The Air We Breathe
Experiment #3: Detection of Ozone |
|
Ozone: The
Good, the Bad, and
the Useful
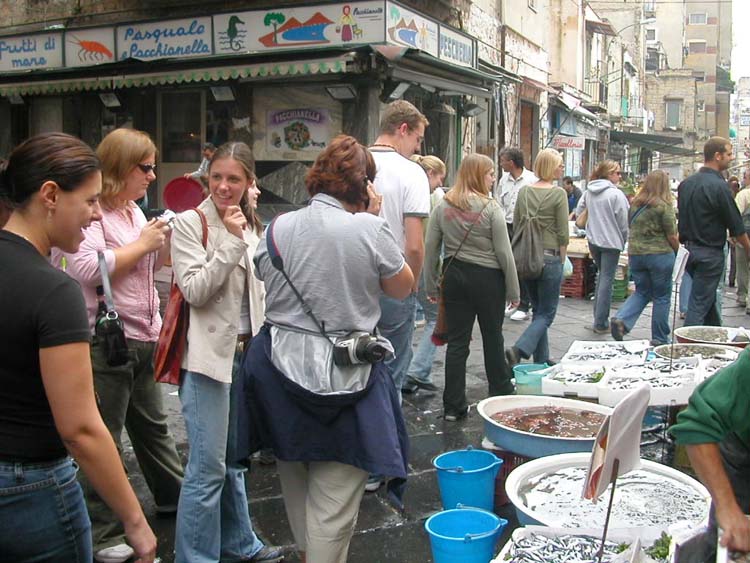
In the open fish market below,
ozone is affecting these students in three ways.
Good) Ozone 20 miles above them is helping to protect
their eyes and skin from UV radiation.
Bad) Ozone at the ground level is harming their
lungs.
Useful) Ozone generators used in the nearby businesses
kills mold and odors.
Useful) Ozone used by the city's water
treatment plant kills bacteria and microbes in the water they drink. |
|
|
|
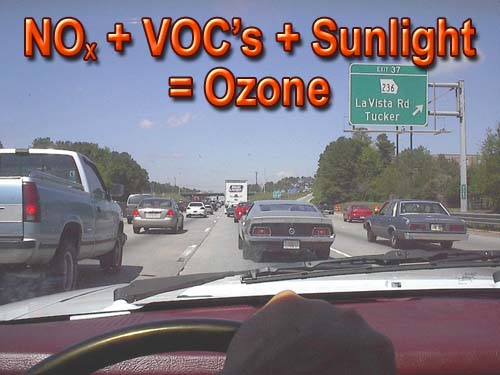
This is the equation normally shown that
identifies the main contributors to ground
ozone. Car engines produce nitrogen
oxides (NOx). Unburnt gasoline supplies much of the volatile
organic compounds (VOC's). These combined with the energy from
the sun produce unhealthy levels of ozone.
This source of ozone pollution gets plenty
of media coverage. However, there are other sources of ozone we don't
hear much about... |
|
POISON IS GOOD?
You will often learn that chemicals which
are deadly are also in widespread use. One reason is that we need chemicals
to kill things we do not want around.
That is why the symbol for poison is smiling.
Poisons realize that even though we don't want to poison ourselves, we
do want them around to poison things we don't want. Ozone
is one of those poisons. |
|
|
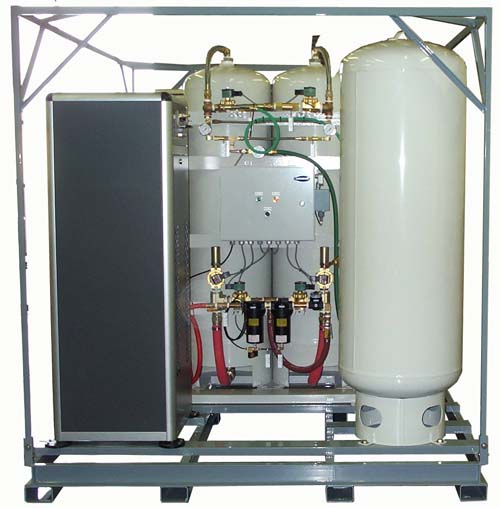
For example, there is a lot in water that we do not want.
Ozone, acting as a poison, is often used to kill bacteria and other microbes
in water treatment plants.
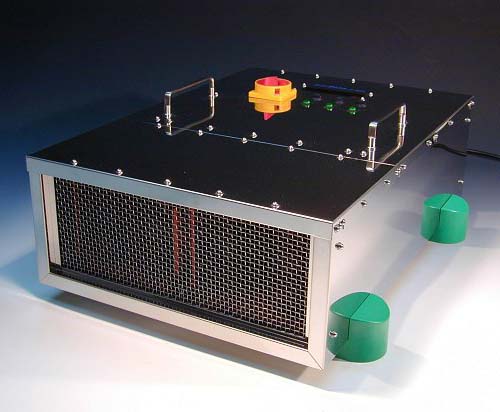
Here is a ozone generator that puts out 35 lbs of ozone
per day. It is used in factories and municipalities for water treatment. |
|
|
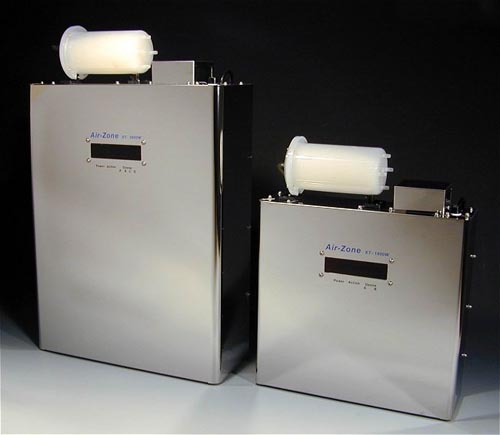
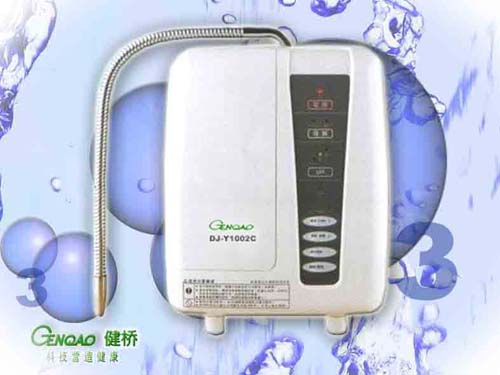
There are even home versions
of these ozone generators. The larger one is for the whole house, the smaller
for under the sink applications. |
|
There are even small (1
foot cube) ozone machines to sterilize foods or dishes. |
|
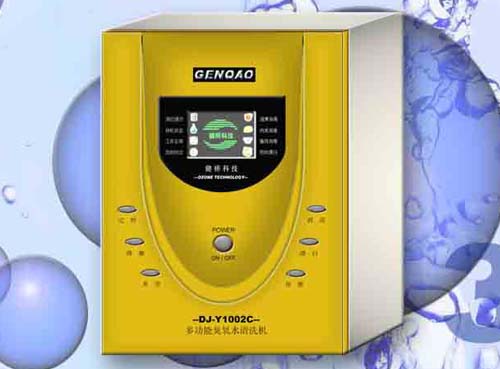
Another model is for washing
hands and face with ozone sterilized water. I'm not sure this is a good
idea. I need to do some more research. |
|
|
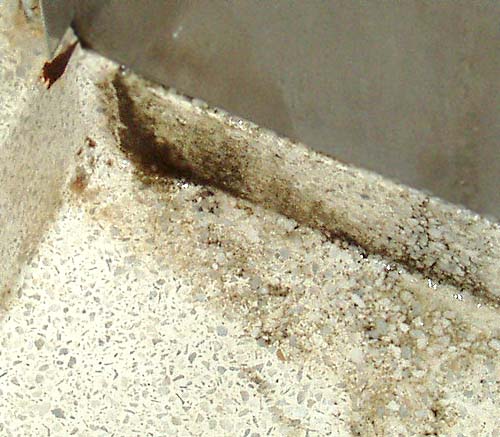
Ozone can also be used to kill mildew, like the type we
see in bathrooms. Of course we usually use bleach. Bleach is easier to buy,
but bleach does not easily decompose.
To kill mildew, ozone has to be in high concentrations;
too high for people to be in the room. Fortunately, ozone will revert
back to oxygen in a few hours and not be a continued threat. |
|
High powered ozone generators
are available for home use that can kill mildew. Like I said, it is not
safe to breathe, so you have to vacate the home while it is in high level
ozone generation mode. The units can then be adjusted to emit safe levels
of ozone for combating odors even while you are in the home. |
|
Restaurants and bars are
just a few places that may use ozone generators to combat odors, or if set
to "high," to disinfect food, utensils, or work areas. |
|
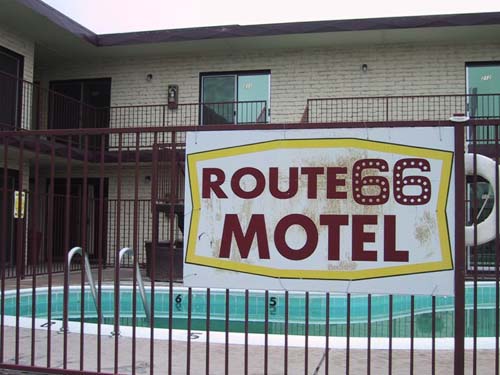
Motels, hotels, and hospitals
also use ozone generators to kill odors, reduce cigarette smoke, and kill
microbes. |
|
|
All of the above applications are good uses
of ozone. The thing to worry about is leakage from the high volume ozone
generators or exposure to excessive or extended levels of ozone from any
ozone generator. |
|
|
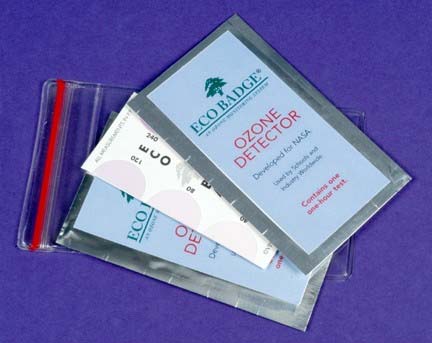
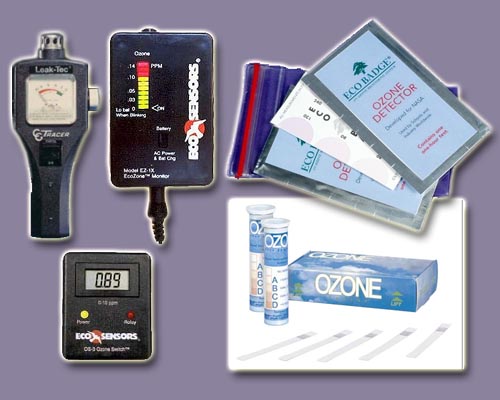
Fortunately, there are detectors for ozone
to warn individuals of high ozone exposure. The more expensive ones are
electronic. They give a reading in a minute or so and are more accurate.
The others use chemicals embedded in paper that change color as they are
exposed to ozone. These take at least one hour to get a reading. Some require
a full 8 hours. In this lab you will make ozone detection strips similar
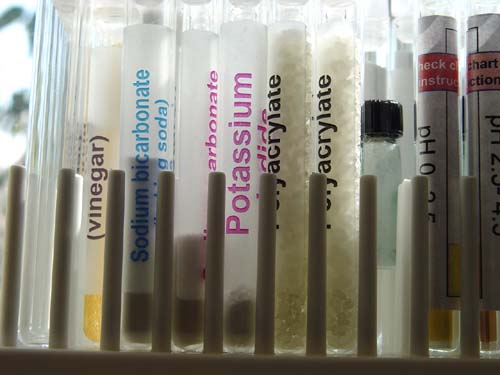
to the ones shown in the bottom right of the picture. |
|
CHEMISTRY OF OZONE DETECTION
STRIPS |
|
Here are the type of ozone strips you
will make. These strips look
homemade because they are homemade, but that's the beauty of it. At home
(not at a lab), you are making a chemical test for a poison called ozone.
The right
sides of the strips have been dipped in a solution of potassium iodide
and cornstarch. The deeper color
means more ozone (O3) has been in contact with the strip. Humidity
in the air also accelerates the color change. |
| Below are
the chemical equations involved in detecting ozone
(O3). The first one shows that potassium
iodide (KI) salt will react with ozone
in the presence of water to form three compounds.
The key one is elemental iodine. Elemental
means it is in its pure form. |
|
|
| (See equation
below) At the same time, the moisture in the air causes some of the potassium
iodide salt to break apart into positive potassium
ions (K+) and negative iodide ions
(I-). The (aq) stands for aqueous, meaning
these ions are dissolved in water. It doesn't have to be liquid water
(normally it is), but water in the air (humidity) can dissolve a little
of the KI salt. |
|
|
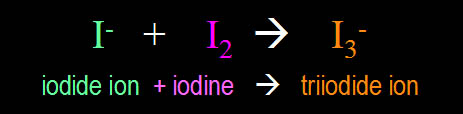
| Now the negative
iodide ion (I-) can combine with
the elemental iodine (I2) to yield
a negatively charged triiodide ion (I3-).
This triiodide ion will combine with the cornstarch
turning it reddish blue. |
|
|
|
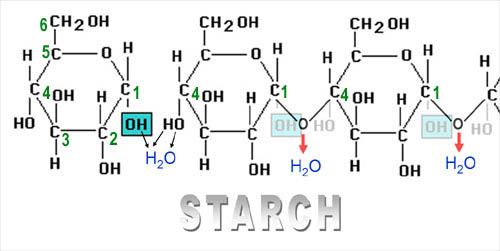
Below you see the negative
triiodide ion combining with a component of
starch called amylose. Starch is made from
chains of the sugar, glucose. When glucose
takes on a certain shape called alpha-glucose
([OH] going down) and then is chained together
at the carbon 1 and carbon 4
positions, the chain is called amylose. |
|
|
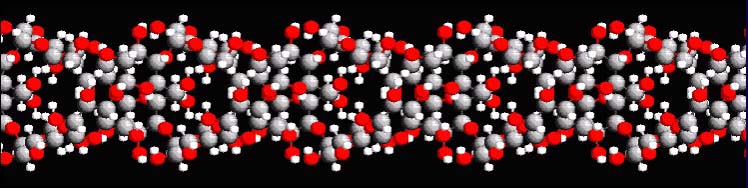
| The chains
of glucose in amylose can form a single or double helix. Below is a section
of a double helix section of amylose. If you roll
your mouse over the image, it will spin. The red spheres are oxygen,
the gray ones are carbon, and the small white ones are hydrogen. Just three
elements make up amylose. |
|
|
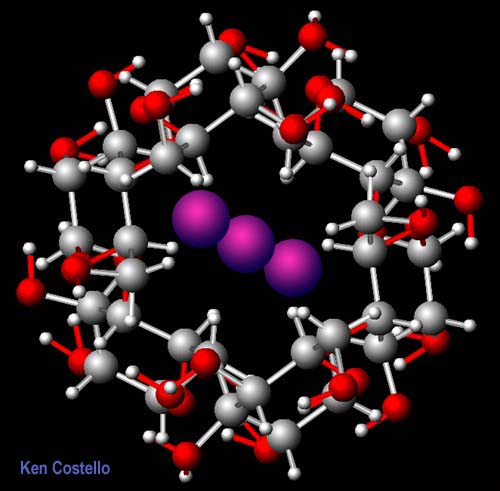 |
This is
an end view of the amylose helix. The triiodide ion
fits nicely inside the helix. Apparently, this complex of triiodide and
amylose captures some of the light causing the amylose (starch) to take
on the reddish blue colors. |
| |
|
ITEMS NEEDED FOR LAB |
|
|
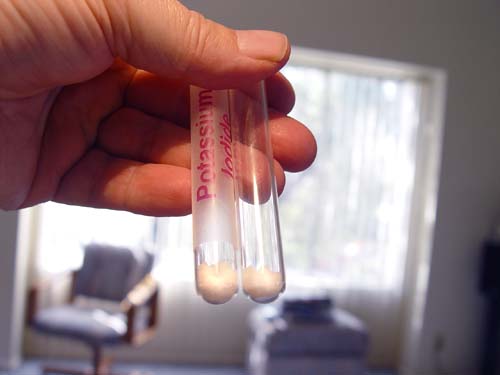
1. Potassium Iodide
2. Cornstarch
Potassium iodide and cornstarch are in two test tubes
in your kit's test tube tray. You can see the potassium iodide test tube
in the picture. The corn starch tube is hiding behind it. |
|
|
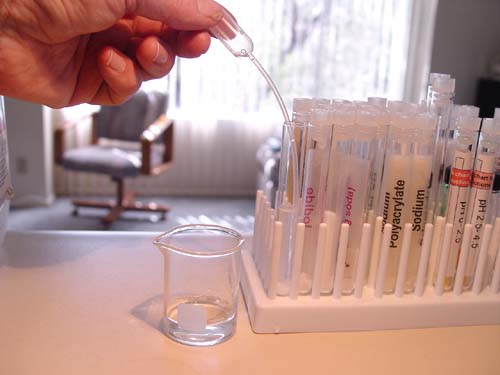
3. A 50 mL Beaker
4. Plastic Pipette
5. Clean Empty Test Tube |
|
|
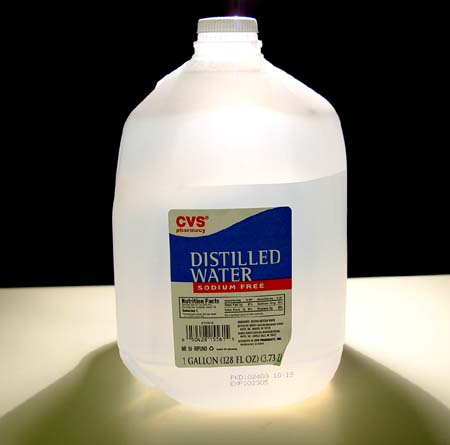
6. Distilled Water |
|
|
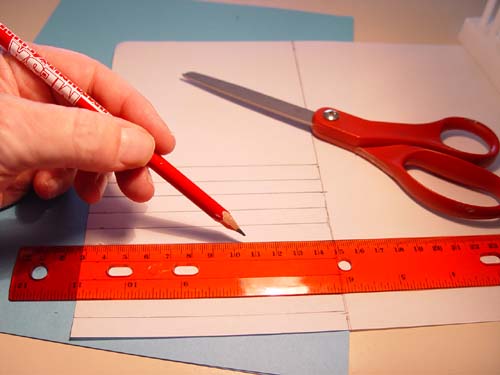
7. Scissors (or paper cutter)
8. Ruler
9. Pencil
10. Typing paper |
|
INSTRUCTIONS
FOR EXPERIMENT |
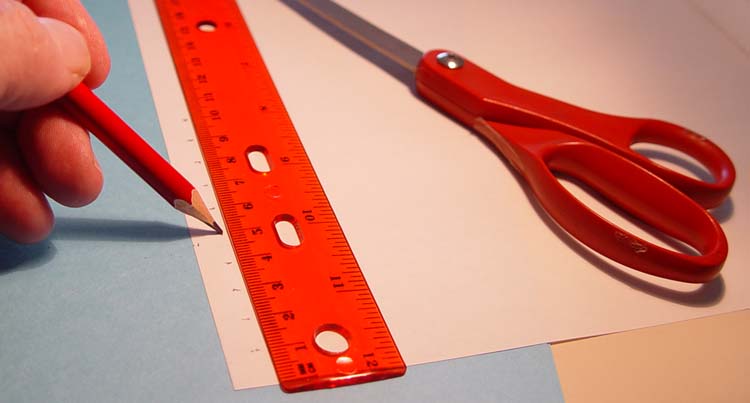
| Below you will see that I am placing dots at
one centimeter intervals. This is the width we will make the strips. I
measured out 10 dots (10 centimeters) but you can measure out more if you
want more ozone detection strips. |
|
|
| Measure 12 centimeters from the bottom of the
sheet and draw a line across the paper. Again, mark along that line at one
centimeter intervals. I hope your lines are straighter than mine. |
|
|
| Below you can see that I
am drawing lines that I will use as guides for cutting out the strips. If
you are using a paper cutter, you would not need to draw these lines. |
|
|
|
I happen to own a cheap ($20)
paper cutter; so I used it to cut the strips. |
|
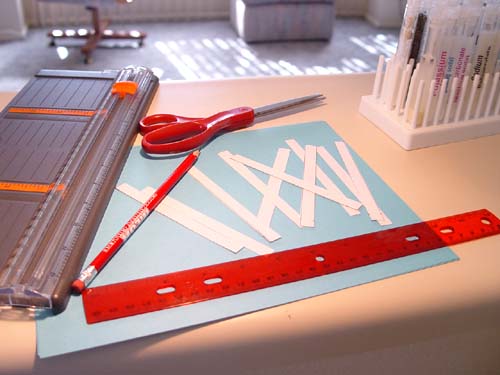
Here I have 10 of them cut. You
may want to cut more. Now is the time to make up the potassium iodide and
cornstarch solution. |
|
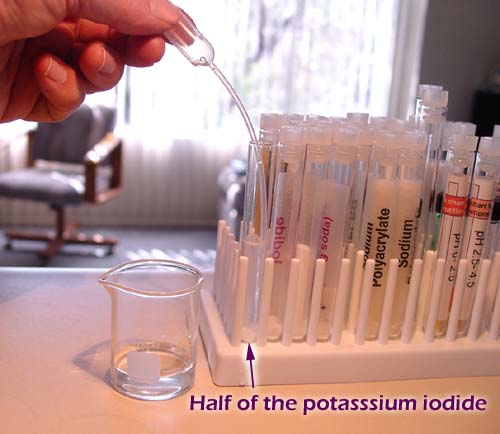
|
Take out the potassium iodide test tube and pour about
one half of its contents into a clean empty test tube. Here you see they
end up with about the same amount. |
|
|
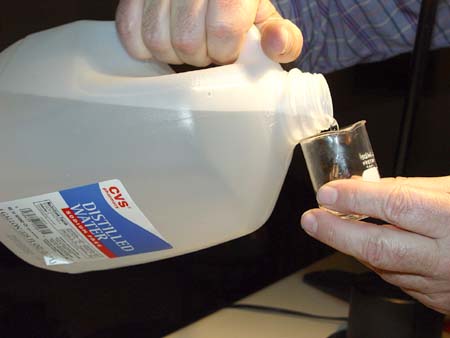
Pour about 10
ml of distilled water into the 50 ml beaker. |
|
|
Add distilled
water to the empty test tube that you had placed one half of the potassium
iodide. You can use the plastic pipette to transfer the water or pour the
water directly in from the small beaker. |
|
|
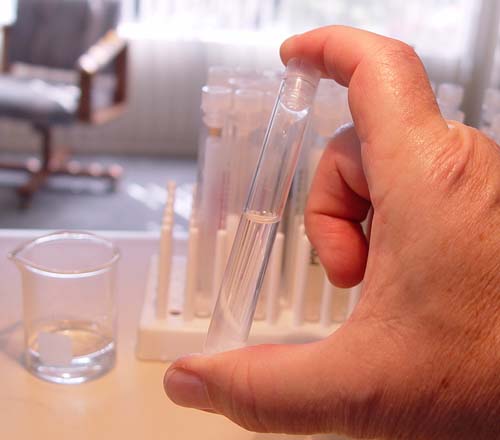
Shake the test tube to dissolve the potassium
iodide. It should dissolve fairly easily. |
|
|
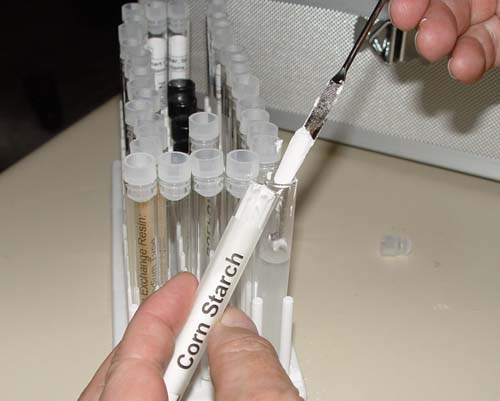
Now use the microspatula to add two scoops of cornstarch
to the potassium iodide solution. |
|
|
Place the stopper back on the test tube and shake it
to mix the cornstarch. The cornstarch will not dissolve but will stay
suspended in the solution for several minutes. |
|
|
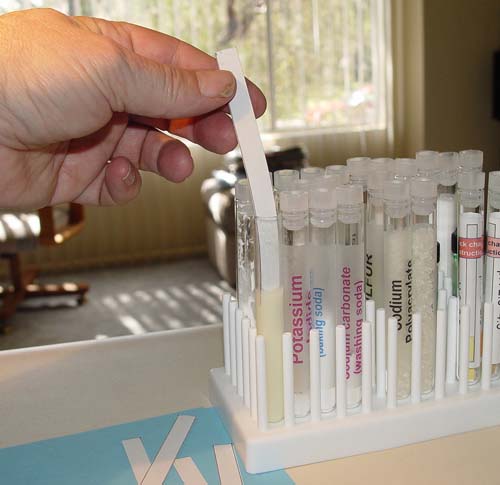
Take cap off
of test tube and start dipping your paper strips into the solution. Allow
the strip to stay in solution for about five seconds before removing. |
|
|
Lay the wet strip on a piece of paper, paper towel, or
cloth. Let it dry. |
| Below you can see that I
had dipped 10 strips into the potassium iodide/cornstarch solution. You
may have more. Let them dry, which shouldn't take long, maybe 20 minutes.
To preserve them, place them in a ziploc bag. |
|

|
 At
this point where all the strips have been dipped, take a picture of them.
Notice: The sunlight and shadows on the floor happen to match the shapes
of the strips. At
this point where all the strips have been dipped, take a picture of them.
Notice: The sunlight and shadows on the floor happen to match the shapes
of the strips. |
|
Testing for ozone at
home and where you travel. |
|
|
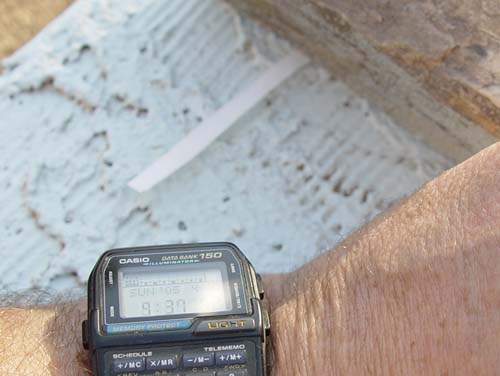
Place one strip
outside where you live. It is best to place it outside in the morning and
retrieve it 8 hours later. Anchor it down somehow. I used a rock, but I
didn't cover up the part of the strip that had been dipped. Air needs to
get to the strip. You can use tape, a paper clip or thumb tack if you want
to secure it. But again, place it so air can get to it.
Take
a picture of where you placed it. |
|
|
Make a note of what time you placed
the strip outside. You will need to leave it there for about 8 hours.
You will also need to know the humidity.
Farther down on this Web page are instructions on how to do that. Look for the heading "Determining Relative Humidity". |
|
|
Place another ozone test strip inside your house somewhere.
Again, it needs to be where the air can flow over it. Also, note what
time you placed it. Retrieve it about eight hours later to read the ozone
level.
|
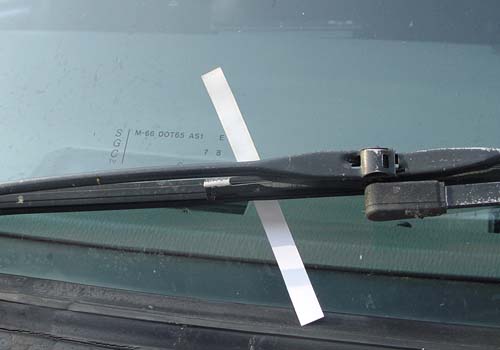 |
On the same
day or a different day where you plan on driving somewhere, place another
strip on your car. Under the wiper blade works well. For example, if you
drive to school or work and leave your car parked there all day, that would
be good. Just report where you went that day and how long your car was either
en route or parked. You are trying to get a total of 8 hours exposure. If
you can, get a picture of the location where you parked.
|
|
|
To calculate the ozone concentration, you need to know
the relative humidity during the day that you had the test strip outside.
At the bottom of this Web page are instructions for finding out that
information. |
|
|
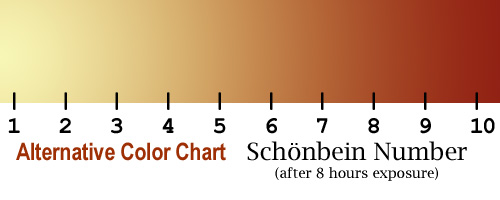
After leaving
the strips exposed to the air for 8 hours, compare their color to the chart
at the left (or the one below), and determine the
"Schonbein number." Schonbein is the discoverer of ozone and gave
it its name, meaning "odd smell". He also developed the
test for ozone using the ingredients you are using in this lab. |
|
The above color
chart uses colors that are given in the literature, but the strips made
with this kit seem to be closer to the color chart to the left. Use whichever
one is easier to match. |
|
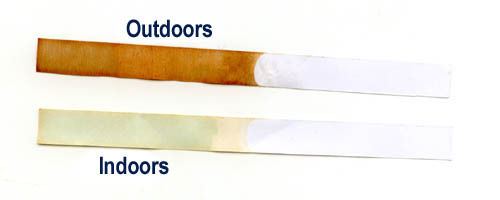
Here are my
outdoor and indoor ozone test strips. The outdoors clearly has the most
ozone. Match the lightest and the darkest colors to the chart above,
then pick the number halfway between them. For example, my outside strip
has parts that match #5 and dark areas that match #8. Halfway between them
is 6.5. The indoors strip shows maybe a level of 1.
Take a picture of
your strips. |
I'd say my outside reading was about 165 parts per billion
(ppb) ozone and the indoor reading was 43 ppb. For gases like ozone,
165 ppb means that for every billion liters of air, there are 165 liters
of ozone present.
|
Locate the Schonbein number on the bottom axis of the
graph. In my case, the Schonbein number was 6.5. Come
straight up and find the spot that comes the closest to the average humidity
during the time you did the test. The average humidity was 32%
for me, so it sits between the 30% and 40% lines, but closer to the 30%
line. At that point go straight to the left to read
the ozone concentration in parts per billion (ppb). The other reading
of "1" is done the same way. > |
Determining Relative Humidity using a "sling psychrometer" or by looking it up online |
| |
|
Below are the instructions of how to find the average
humidity for the time the strip was exposed. First go to this site: http://www.weather.gov/
1) At left of the page, type in your zipcode and click "Go".
2) A new page will appear with the current weather for that zipcode. In the center is the current humidity.
3) At the right of the page is a link titled "3 Day History". Click that link and it will take you to a new page.
4) On the history page is a list that shows the temperature and humidity about every half hour for the last 3 days. Use that to find the humidity at the time you first placed the strip and the humidity at the time you read the strip about 8 hours later. |
|
|
This is the table shown at the EPA website for air quality
called, "AirNow". Their website is:
http://www.epa.gov/airnow/
The reading above of 165 is in the unhealthy range. The
reading of 40 is in the good range. |
 |
Before I go
complaining to the EPA about the 165 reading, I would find a more accurate
means of measuring ozone. The test strips in the lower right are probably
a little more accurate and fairly cheap. The Ecobadge ($10 each) is more
accurate, and if you buy the electronic reader ($100), it is quite accurate.
The other electron ozone testers shown are a few hundred dollars. Your kit now has one Ecobadge. |
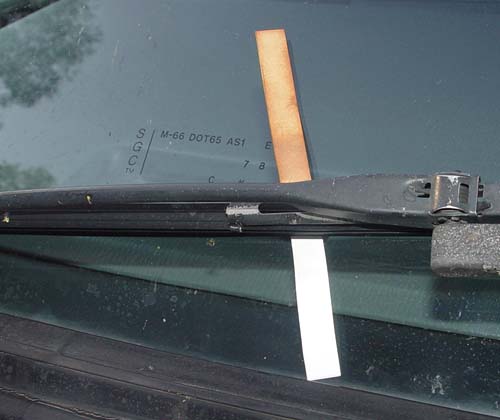 |
This is the ozone test strip that was
on my car parked at the college for about 8 hours.
This was a different day, so I had to
look up the humidity for that day using:
http://weather.newsday.com/
The average humidity was 26% on this day. See above on
to see how to find the average humidity.
|
 |
Using the chart
to the left, I estimate the light colors on the strip to be "3"
and the darker colors to be "5." The average would be "4." |
|
To read the
ozone that has a Schonbein number of 4, start at the bottom line and go
up from 4 to the place you estimate the humidity. For that day, the average
humidity was 26%, so I go up between the 20% and 30% lines to the approximate
26% position. Then go left to read the ozone level. I estimate it to be
145 parts per billion. This is high. |
|
|
Here is a blank chart for you to use. |
|
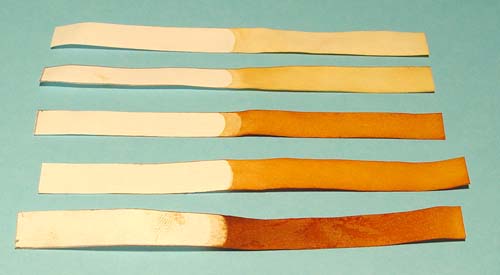
I haven't yet
calibrated these strips to see if they truly measure these levels. However,
these strips clearly show the relative levels of ozone. If the strips here
were all exposed at the same humidity for the same length of time, we would
know that the area where the bottom strip was exposed has the highest level
of ozone. The next two strips going up had the next highest levels, and
the top two had the lowest levels. This is still important information. |
|
|
As I mentioned you do have an ECO BADGE so you can do a more accurate measurement
of ozone in an area that you perceive as having high ozone levels according
to your own ozone test strips. I just need to place a color chart on the Web for you to do the measuring. |
|

|
Report the following findings:
Average Schonbein number for Inside strip=?
Relative humidity (use outside)= ?
Ozone ppb (Inside) = ?
Average Schonbein number for Outside strip=?
Average relative humidity = ?
Ozone ppb (Outside) = ?
Average Schonbein number for strip taken away from the
home=?
Average relative humidity = ?
Ozone ppb (Outside away from home) = ?
Location where this strip spent most of the day=?
Send pictures that were taken. Use CHM107@chemistryland.com to send report and photos. |